
1/ Make sure you have the required permissions
Before importing a pst to an exchange mailbox, make sure your are assigned the role Mailbox Import Export, it’s a pre requisite for using the below process.
2/ Prepare your pst import mapping file
Supposing the pst file you want to import is located in a network share named : \\myPC\ImportPST

Your mapping file should contains the below data
Name : pst file name
Mailbox : the destination mailbox email address
IsArchive : FALSE – because the mailbox we are importing is not an archive mailbox
TargetRootFolder : “/” – we want to import the data to the root folder of the destination folder. If you want to import data to a folder named “myImport” for example, use this synctax : /myImport
In this example, here is how my mapping csv file looks like. I saved it on my computer as import.csv

You are almost ready to import your PST data to an Office 365 mailbox.
3/ Start the import job
Connect to the Security and compliance center (https://protection.office.com), then under Information governance, select Import > New import job
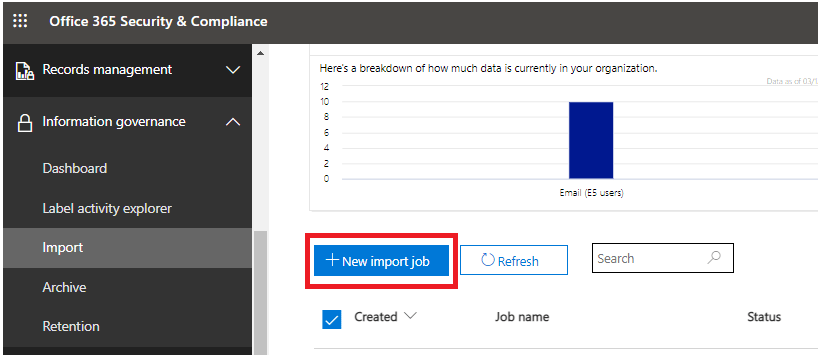
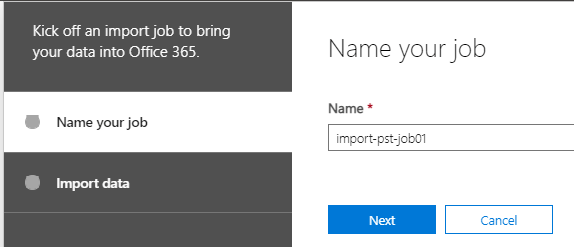
Name your import job with 2-64 lowercase letters, numbers or hyphens, must start with a letter, no spaces
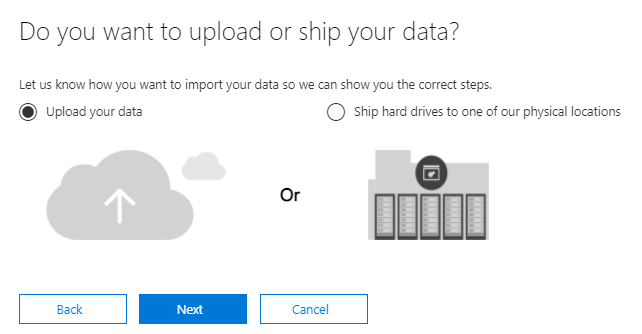
In the next page, select Upload your data > Next
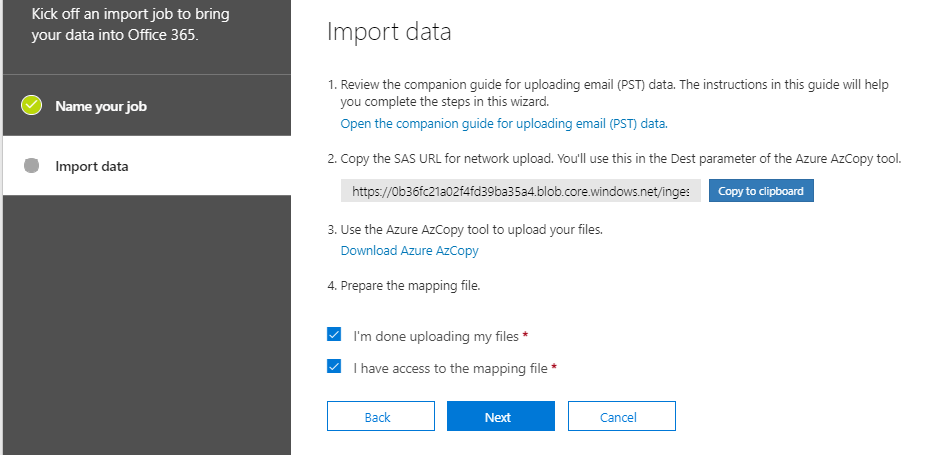
On the import data page, click on Show network upload SAS URL and copy it to clipboard.
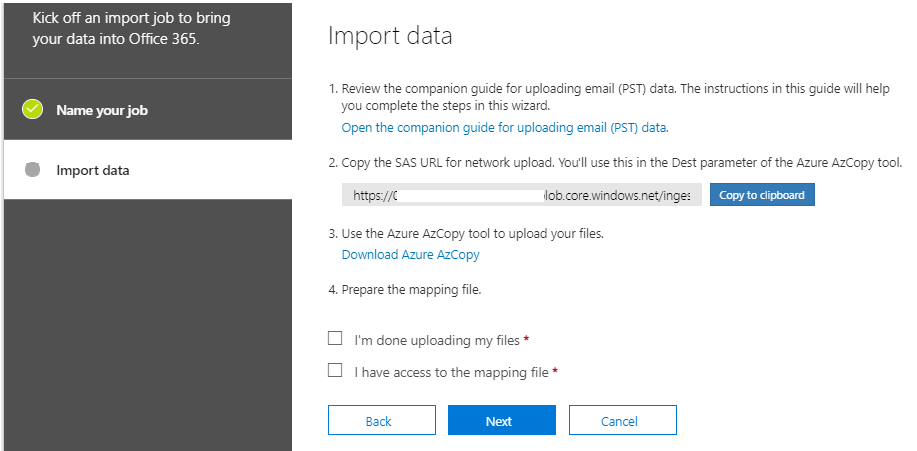
Click on the link Download Azure AzCopy and install it.

The default location of AzCopy will be C:\Program Files (x86)\Microsoft SDKs\Azure\AzCopy\
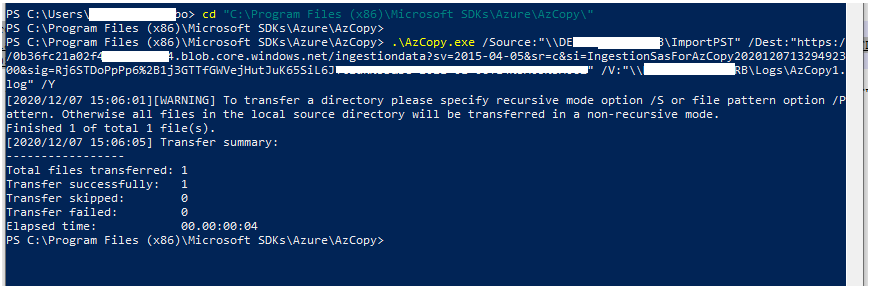
You are now ready to begin the data import. Open a PowerShell and run the below command to copy your pst file using AzCopy to a temporary Azure Storage from which you will copy the data to destination mailbox.
cd "C:\Program Files (x86)\Microsoft SDKs\Azure\AzCopy\"
Then run the below commandline replacing the value with your own data
.\AzCopy.exe /Source:"\\myPC\ImportPST" /Dest:"<Copy here the previous SAS URL>" /V:"\\myPC\Logs\AzCopy1.log" /Y
Back to the Import data page, check the two checkboxes “I am done uploading my files” and “I have access to the mapping file” and go on the next page clicking on the next botton.
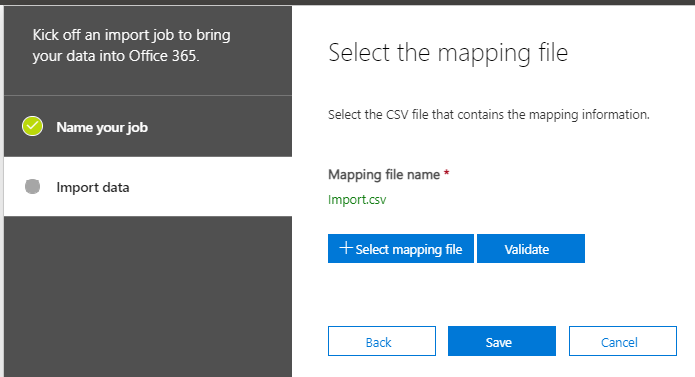
Now click on “Select mapping file” and choose the the mapping csv we previously built. Validate the file and Save the job to begin file analysis.
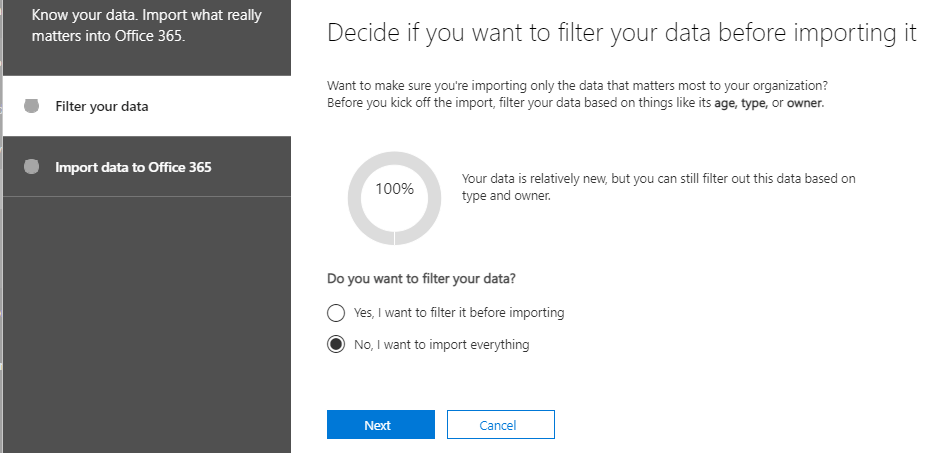
A job analyse will start. Once it’s done you will be able to import the PST data to the destination mailbox.

Click on the link “Ready to import to Office 365”, on the next page click on “Import to Office 365” button and start the import job.
Select the Next button, and start the data importation on the next page. Once you are done, you will
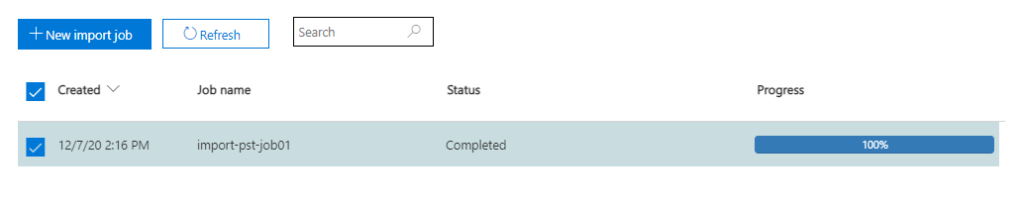
4/ Check if the import job was successful
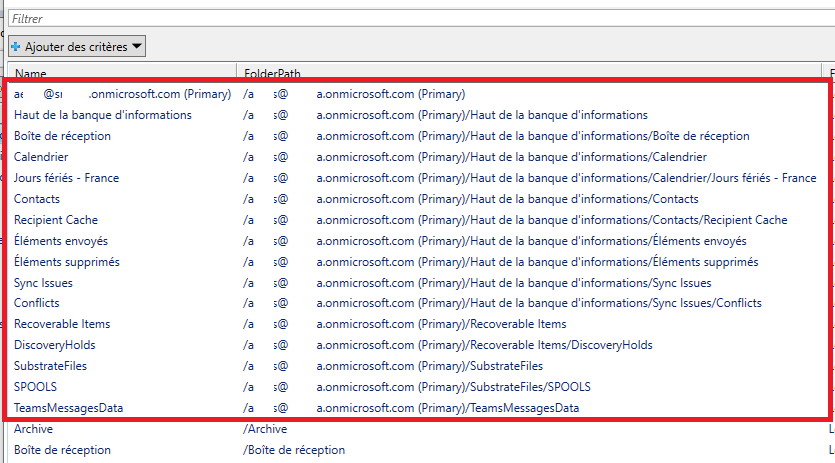
You are done with the copy, now, let’s check in the destination mailbox if the data has been well copied. In outlook, you will see a folder named <source email address>, it’s the email address of the mailbox from which you have exported the pst file.

If you had chosen to import the pst file into a folder named /importPST, you would have seen in Outlook, under that folder another folder named <source email address>
Another way to check your pst import result is use a powershell command :
Get-MailboxFolderStatistics <destination mailbox> | Out-GridView
Et voilà 🙂
